| Key Links |
| - Accessibility - Pricing - Free Trial - Order Form - Downloads - My Account - Contact Us - FAQ |
| Data Packages |
| - Stocks - Futures - Forex - Data Content Tables - FAQ |
| Norgate Data Updater |
| - Overview - Installation - Usage - Watchlist Library > Tools - FAQ |
| AmiBroker Plugin |
| - Overview - Plugin Installation - Database Creation - Database Layout and Content - Usage - Known Issues - FAQ |
| Python Package |
| - Installation & Usage |
| Zipline Package |
| - Installation & Usage |
| RightEdge Plugin |
| - Overview - Plugin Installation - Plugin Configuration - Usage - FAQ |
| Wealth-Lab Extension |
| - Overview - Extension Installation - Extension Configuration - Usage - FAQ |
| Notes |
| - Refunds Policy - Privacy Policy - Licence Agreement - NDU Change Log - System Requirements - Alternative Market Glossary |
Norgate Data Updater Tools
Data Viewer
The historical data for any security can be viewed in table form via the Data Viewer. Click on Tools > Data Viewer and then
select a Database or a Watchlist. You can search for a security by symbol or name. Once you have highlighted a security, the data will appear in table form, with data fields/columns that are appropriate to the security type.
Notes:
- After clicking the Data Viewer icon, wait a second or two for the module to open. Clicking the icon again will open a second instance of it.
- The historical data for a stock may show different values depending on how you have chosen to have it adjusted under "Data Configuration > Stocks". Also, the data for any security may show differently depending on the selection for "Padding".
- You can use "Data Viewer" as a cross-check if viewing the data in another application suggests that a symbol might be missing from the database, or that some data might be missing or incorrect.
Export Task Manager
Use the Export Task Manager to manage the export of historical price & volume data from the NDU database. The available export formats are:
- ASCII
- MetaStock "Legacy" format
Guide to creating an ASCII format task
Guide to creating a MetaStock "Legacy" format task
Running a task
Editing a task
Things to watch out for
Creating an ASCII format export task
Open the Export Task Manager and click the "Create" button to launch the Norgate Data Export Wizard which will step you through the process of constructing an export task.
Step 1 - Select ASCII as the export format
 Show Image
 Hide Image
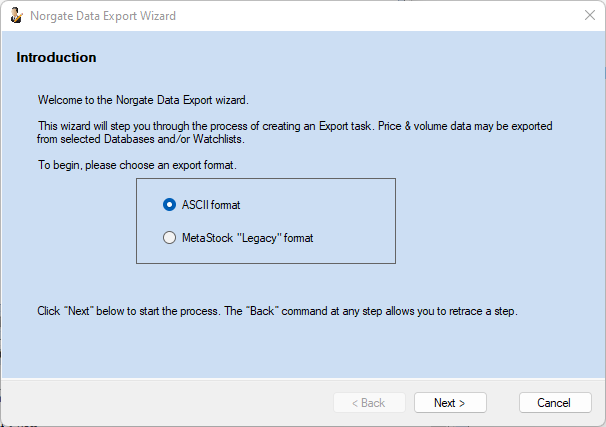
Step 2 - Select what to export
Show Image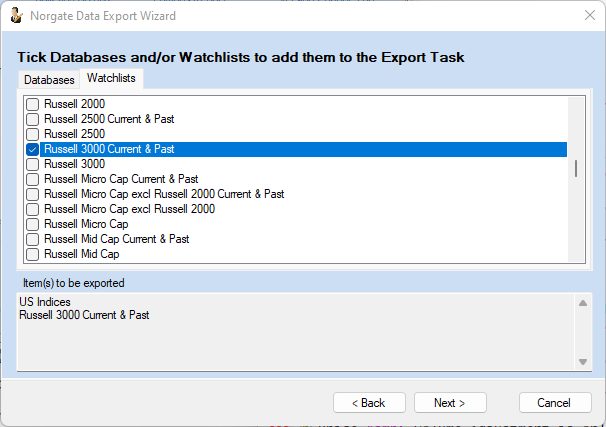
You can elect to export the contents of a single Database or Watchlist or add multiple items of either sort to the same task.
Step 3 - Configure the underlying data
Show Image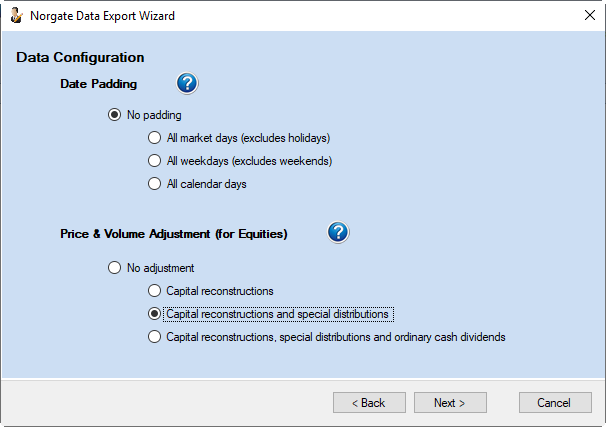
Price & Volume Adjustment is only relevant if you are exporting data for Equities.
Step 4 - Select the fields you want to include
Show Image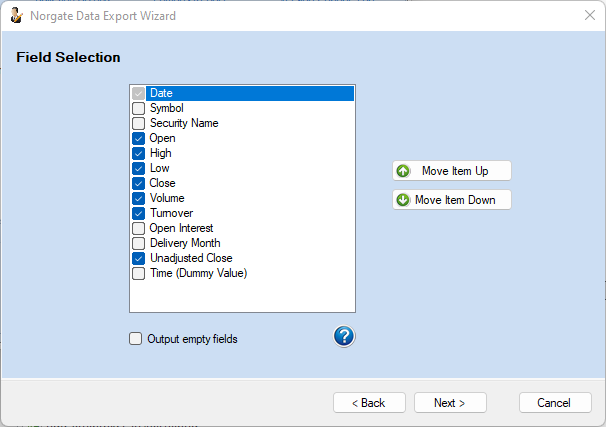
Some fields are relevant for all security types whilst others are specific. For instance -
"Volume" is not relevant for Economic or Cash Commodities data.
"Delivery Month" is only relevant for Continuous Futures.
If you are exporting a variety of security types in the same task, you can tick every field that is needed to cover the full variety. The output will only include an irrelevant field for a particular security type if you tick the option to "Output empty fields".
Some applications may expect the data to contain a field for "Time" as well as "Date". If so, tick the field "Time (Dummy Value)". You can enter a dummy value at the next step.
Step 5 - Field Options
Show Image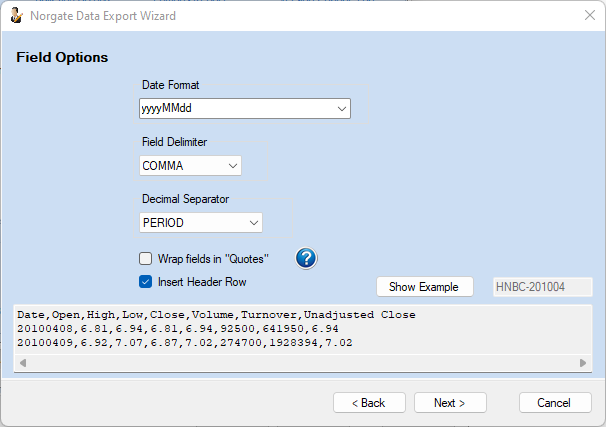
This is where you define the form of the output. Click the "Show Example" button to preview the output. You can click the button repeatedly to show a series of examples.
Some selections may produce ambiguous output. For instance, you may have earlier selected "Security Name" as a field to be output. Security names will contain spaces. If you then select "SPACE" as the Field Delimiter, a space in the Security Name will be interpreted as a field break. To deal with such conflicts, tick the option to "Wrap fields in Quotes". This works to contain the data in the relevant field.
Step 6 - Date Range Options
Show Image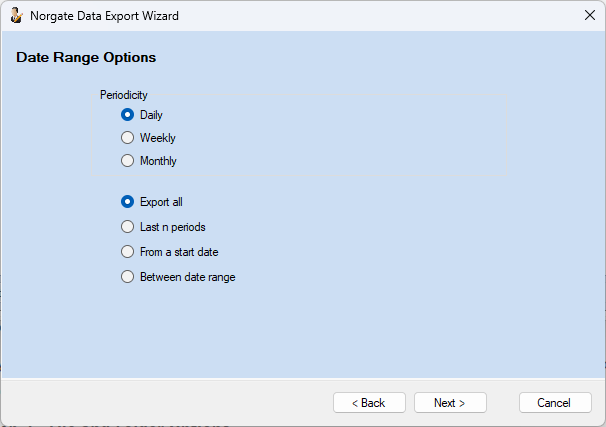
You can elect to export all of the data for each security or only part of it.
Step 7 - File and Folder Options
Show Image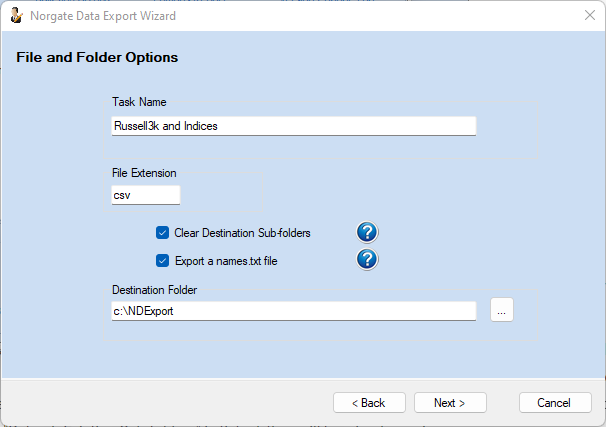
This is where you assign a name to the task and specify the location for the exported data.
"File extension" is user-determined. The default is "csv" (comma separated values) to match the default Field Delimiter. ASCII files delimited in other ways typically have the extension "txt".
The option to "Clear Destination Sub-folders" is an important one. If this option is left unticked, securities that no longer exist will remain in place from previous exports. Ticking the option serves to clear all sub-folders first which allows a contemporary (fresh) export each time. We strongly recommend that export sub-folders be kept free of data files from other sources, or any other files at all. If the option to "Clear Destination Sub-folders" is ticked, they will be wiped away!
The option to "Export a names.txt file" enables the creation of a text file in each export sub-folder to show the Symbol and Name of each security in the sub-folder.
The Destination Folder holds the data in sub-folders that are named according to the items that have been exported (an item is a Database or Watchlist).
Creating a MetaStock "Legacy" format export task
Open the Export Task Manager and click the "Create" button to launch the Norgate Data Export Wizard which will step you through the process of constructing an export task.
Step 1 - Select MetaStock "Legacy" as the export format
Show Image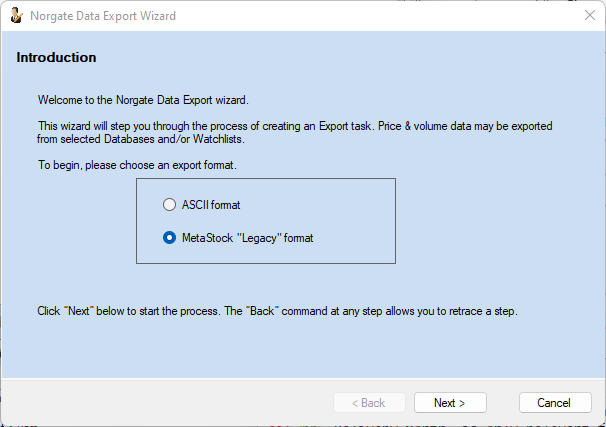
The MetaStock "Legacy" format can be used by older versions of MetaStock™ (e.g. versions 9, 10 and 11) as well as by recent versions (e.g. 15, 16 and 17).
Step 2 - Select what to export
Show ImageYou can elect to export the contents of a single Database or Watchlist or add multiple items of either sort to the same task.
Step 3 - Configure the underlying data
Show ImagePrice & Volume Adjustment is only relevant if you are exporting data for Equities.
Step 4 - Date Range Options
Show Image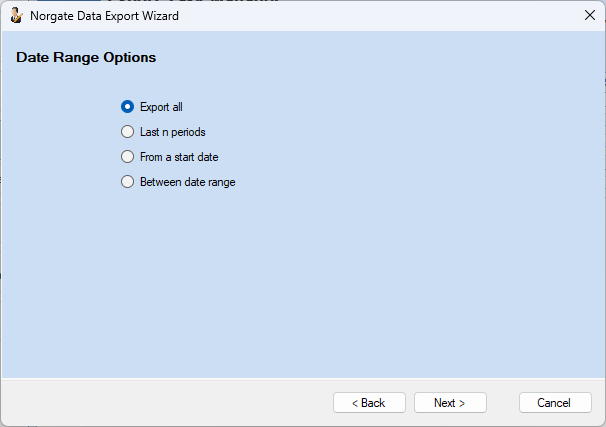
You can elect to export all of the data for each security or only part of it.
Step 5 - Folder Structure Options
Show Image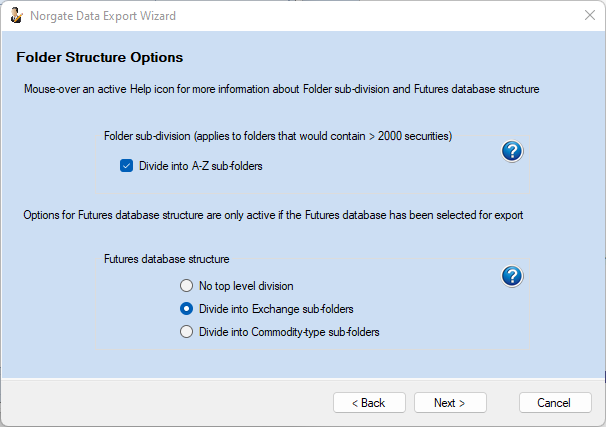
There are options for 2 separate sections - "Folder sub-division" (which applies generally) and "Futures database structure" (which is only relevant if you are exporting the Futures database).
If you tick the option to "Divide into A-Z sub-folders" then any output folder that would otherwise contain more than 2,000 securities is sub-divided into A-Z sub-folders. This sub-division is maintained even if the number subsequently falls below 2,000. Because a MetaStock format data folder cannot contain more than 6,000 securities, folder sub-division gets applied automatically to any output folder that would otherwise exceed that number.
The default option for "Futures database structure" is "No top level division". Given this selection, the "Futures" folder is sub-divided into contract folders (Australian Dollar, Bitcoin, Brent Crude Oil etc.). If a top level division is selected, then the contract folders are organized either by exchange or by commodity-type.
Running a Task
To run an Export task, open the Export Task Manager, tick the relevant task (or tick several tasks) and then click "Run".
You can also set NDU to run tasks automatically after a data update via the tick-box options under Settings > Update Mode.
Show Image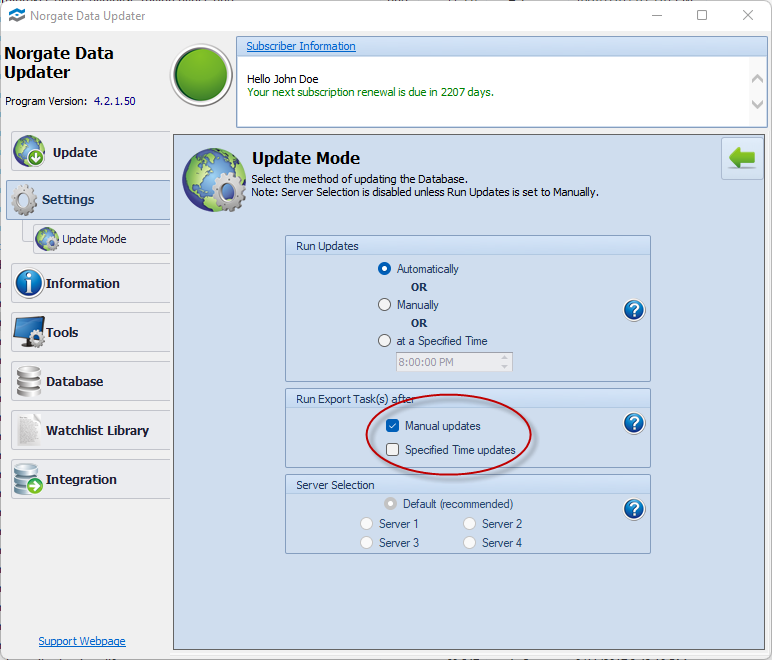
Notes:
If you have created a number of tasks, but only want some of them to run automatically, you can change the "State" of the others from "Active" to "Paused" via the Pause/Unpause command.
To run active export tasks after an update launched via NDU.Trigger,
add the command line parameter EXPORT.
Exports do not work incrementally. Whether you're exporting a database or a watchlist, the entire item gets exported each time. The process still goes quite quickly if you have a Solid State Drive. For instance, on a typical machine with an SSD, it should only take about 25 secs to export the entire ASX Equities database. The Futures database might take about 90 secs.
Editing a Task
You can change any aspect of an existing Export Task via the Edit command. For instance, if you would like to export an additional item, you can add it to an existing task rather than create a new task for it.
Things to watch out for
- Make sure that all files previously exported are closed before running an Export. If an ASCII file is found open, the export should continue, but the open file will be skipped. If a MetaStock format data folder is found to be in use by an external application, then the entire folder will be skipped.
- Make sure that the Destination Folder continues to have "write permission" and is otherwise accessible.
- Don't add files from elsewhere to your Destination sub-folders.
- Don't rename a Watchlist that's currently part of an Export Task. Instead, first remove the Watchlist from the task via Edit or simply delete the task. Then rename the Watchlist and add it to Export again.